April 25, 2024, 06:17:08 PM

collapse

Show Posts

This section allows you to view all posts made by this member. Note that you can only see posts made in areas you currently have access to.


Topics - S.Prime

Pages: 1 [2] 3 4 ... 7
16
WugFresh one of the popular Rootkit developers has posted a guide with 3 options for installing an OTA, including the advantages and disadvantages of each option. Even if you prefer to wait on the OTA from Google, the discussion provides some valuable information for the rooted and non-rooted user, when an OTA installation goes unexpectedly.

Just tap the link following the screen shot.


http://www.wugfresh.com/faqs/how-to-update-ota-not-working/


Sent from my Nexus 7 using Tapatalk

17
New Nexus 7 Android OS (2nd Gen) / KitKat 4.4.2
« on: December 09, 2013, 04:12:01 PM »
Even before KitKat 4.4.1 has finished rolling out we have a 2nd OTA, KitKat 4.4.2. I have seen multiple reports of the 4.4.2 OTA rolling out to the Nexus 4, Nexus 5, and Nexus 7. It is surfacing without a change log, just as 4.4.1 rolled out without a change log.


18
New Nexus 7 Android OS (2nd Gen) / KitKat 4.4.1
« on: December 08, 2013, 01:55:05 PM »
I have  sideloaded KitKat 4.4.1 and will post my initial thoughts after testing.


Sent from my Nexus 7 using Tapatalk

19
The Lounge: Off Topic Forum / US Thanksgiving Greetings by Region
« on: November 28, 2013, 06:04:18 PM »
Is it,  "You guys have a great Thanksgiving" or is it from down South, and "Y'all have a Happy Thanksgiving"? For me it is y'all. :-)


Sent from my Nexus 7 using Tapatalk


20
New Nexus 7 Android OS (2nd Gen) / ART vs Dalvik in KitKat
« on: November 28, 2013, 04:34:49 PM »
ART (Android Runtime) is replacing Dalvik, reducing app lag and increasing battery life in upcoming releases of Android, but we can test drive it on KitKat on the Nexus 7 2013 (Sorry the Nexus 7 2012 and the Nexus 10 do not have this feature). After initial testing, I will have to admit that there is a noticeable difference in app lag. So, if you want to eliminate the spinning icon when you open our favorite forum, switch to ART and watch it open instantly. Look for the install guide after the following quote.


Quoted from Android Police Here

Quote
ART, which stands for Android Runtime, handles app execution in a fundamentally different way from Dalvik. The current runtime relies on a Just-In-Time (JIT) compiler to interpret bytecode, a generic version of the original application code. In a manner of speaking, apps are only partially compiled by developers, then the resulting code must go through an interpreter on a user's device each and every time it is run. The process involves a lot of overhead and isn't particularly efficient, but the mechanism makes it easy for apps to run on a variety of hardware and architectures. ART is set to change this process by pre-compiling that bytecode into machine language when apps are first installed, turning them into truly native apps. This process is called Ahead-Of-Time (AOT) compilation. By removing the need to spin up a new virtual machine or run interpreted code, startup times can be cut down immensely and ongoing execution will become faster, as well.
At present, Google is treating ART as an experimental preview, something for developers and hardware partners to try out. Google's own introduction of ART clearly warns that changing the default runtime can risk breaking apps and causing system instability. ART may not be completely ready for prime time, but the Android team obviously feels like it should see the light of day. If you're interested in trying out ART for yourself, go to Settings -> Developer options -> Select runtime. Activating it requires a restart to switch from libdvm.so to libart.so, but be prepared to wait about 10 minutes on the first boot-up while your installed apps are prepared for the new runtime. Warning: Do not try this with the Paranoid Android (or other AOSP) build right now. There is an incompatibility with the current gapps package that causes rapid crashing, making the interface unusable.


Installation Guide:

Step 1:

Go to Settings -> Developer options -> Select runtime -> Tap ART.

Step 2

Follow the prompt to restart the tablet.

Step 3

On restarting the OS will show "Updating Apps" followed by a 2nd updating prompt, which will require 5 to 10 minutes, so make sure you are sufficiently charged or connected to a power source. Reverting to Dalvik is accomplished by following the same procedure.

Note, not all apps are compatible, like WhatsApp, but so far I have found nothing incompatible. Remember that you should have your data backed up, before testing any feature like ART on your device. Personally, I made a nandroid backup before experimenting.

If you decide to try ART, post your results and thoughts.


21
Mark Skippen released his "Unified Toolkit"  today, which will support the whole spectrum of Nexus devices, as the stages roll out. The full featured version will be available from XDA and a donate version will be available with extra features.

http://forum.xda-developers.com/showthread.php?t=2525026
[TOOLKIT] SKIPSOFT ANDROID TOOLKIT - NEXUS 5 V1.0.0 - Drivers, Root, Recovery + MORE

Sent from my Nexus 10 using Tapatalk


22
New Nexus 7 General Discussion Topics (2nd Gen) / Screen Replacement
« on: November 10, 2013, 03:06:58 AM »
We have seen the occasional post where someone has dropped their Nexus 7 and cracked the screen and that the Asus repair cost is simply too expensive. But eBay is now showing the complete screen assembly for the Nexus 7 2012 for approximately $66 US and $94 US for the 2013. So if you are not timid when it comes to electronics and you have about 2 hours to spare this could be your fix. The following link to Google+ describes a successful replacement.

https://plus.google.com/101798188708890279354/posts/UrPhotPgHz6


Sent from my Nexus 10 using Tapatalk


23
Chromecast And The Nexus 7 / Pandora Internet Radio Comes to Chromecast
« on: October 31, 2013, 03:59:27 AM »
Pandora Internet Radio was promised last summer at the Chromecast introduction, and now it has happened. Download the newest version of the Pandora Internet Radio app from the following link, select your station and tap the Cast button at the top right of the new tablet optimized app and enjoy your favorite music on your Chromecast enabled entrainment system.


https://play.google.com/store/apps/details?id=com.pandora.android


Sent from my Nexus 7 using Tapatalk


24
Post your Questions and Suggestions for the Root Restoration Guide in this Topic.

25
With the release of Android 4.3, we find that OTA RootKeeper can no longer preserve root after an OTA (Over The Air) update. Therefore, we must restore root after running Android 4.3 updates. Fortunately Mark Skippen's toolkit offers an easy root restoration option using a single click.

Step 1

Download Mark’s Root toolkit Nexus 7 2013 Here. and Nexus 7 2012 Here

Install the toolkit on your computer and connect your Nexus 7 by USB cable


Step 2

Select Option 4 and follow the prompts after your Nexus 7 reboots you will find that your SuperUser app functions again as well as any apps that require root access.


Note:

This guide only applies to a previously Rooted Nexus 7 that has lost root due to a Google Android update.

Make sure that you select the correct toolkit for your Nexus 7 as Mark has a different toolkit for each version of our Nexus 7 (2012 and 2013) and be advised that this guide is based on the latest donate version of the respective toolkit.


Please post any questions or comments in the topic support thread Here.

26
Post your questions and Suggestions for the Step by Step Rooting Guide for the Nexus 7 2013 here.

27
How to Root Your Google Nexus 7 2013 2nd Generation and 2012 1st Generation Tablet

This step by step guide will help you unlock the bootloader, root your tablet, install a superuser app, busybox, and a custom recovery.

Rooting, for those of you that don't know, means giving yourself root permissions on your Android device. This is similar to running programs as administrators in Windows, or running a command with sudo in Linux. With a rooted Android device, you can run apps that are normally blocked because they require access to the system area of your device. The locked system partition on an Android phone or tablet allows the vendor to channel the usage of the device to enhance their profit potential, much as Amazon did with the Kindle Fire which limited purchasing apps to the Amazon App Store.  With root you can also install developed ROM’s, which are custom versions of the Android operating system that are preconfigured with many helpful apps that require root access. Custom ROM’s are like a facelift for and Android device. Recovery on an Android device is a utility accessed on startup which allows you to wipe user data and reset your device to the factory state, but with root you can install a custom recovery like TWRP or CWM. Custom recoveries will allow you to create a full backup of your device, install custom ROM’s and kernels for over clocking your device.  We will discuss these features in more depth in additional topics.

In Summery Rooting will allow you to:

1.Install a custom recovery like TWRP or CWM or other software
2.Run apps that require root permissions, such as Titanium Backup or AdAway
3.Completely backup and restore the device (Nandroid Backup) or flash custom ROMS

Some cautions before starting:

1.Since unlocking the bootloader will wipe all data from your device, it’s a good idea either to back everything up before starting. This means pictures, music, videos, etc.
2.You will have to reinstall all of your apps and you will be prompted to enter your Google account information
3.Go to Settings  then about and check for updates and update to the latest version  for your tablet before starting (Version 4.3 at the time of this topic)
4.Rooting your device is not illegal, but it will void your warranty. The rooting program does have the option to relock the bootloader and remove root if you require warranty service.
5.There is always the chance that you can brick your device, which is very unlikely if you follow the steps correctly, but I assume no responsibility for your device.

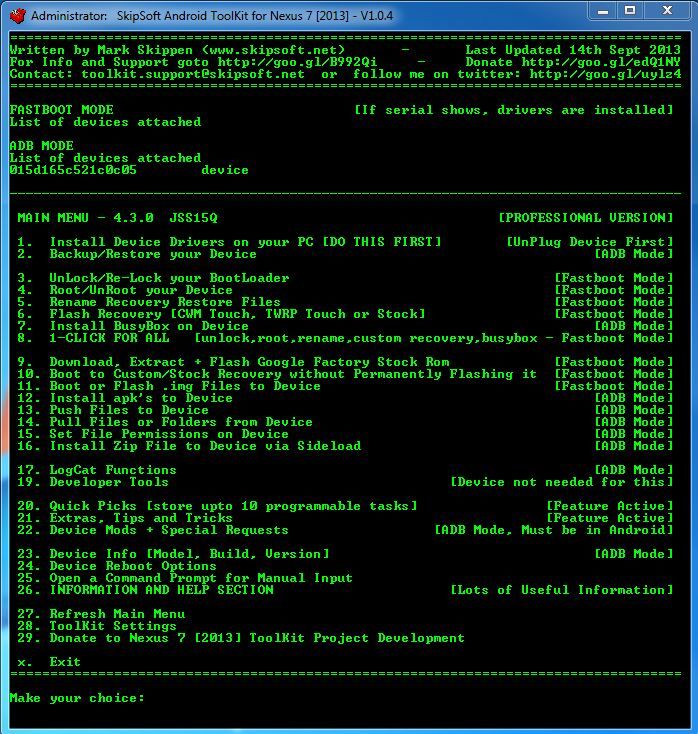
Fortunately for our purpose Android Developers have produced “Nexus Root Toolkits” which support a one click root for our Nexus 7 2013.

Step 1:

Pick your Toolkit from the two that I have used:

  • Mark Skippen's Nexus 7 Universal Toolkit on xda Here
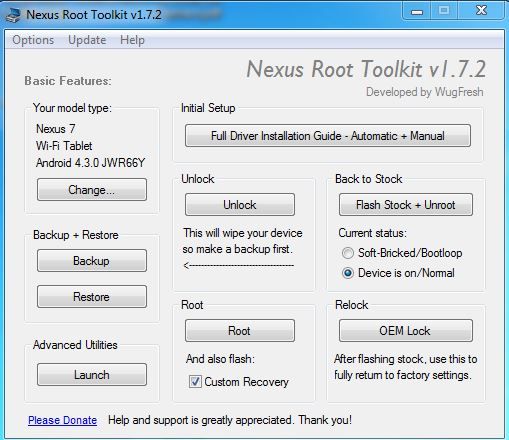
  • WugFresh's Nexus Root Toolkit Here


Each Toolkit has advantages and both offer a free version, but I have chosen to donate to both developers to support their work. The WugFresh toolkit supports multiple Nexus Devices, and while Mark Skippen's Universal  Toolkit supports multiple Nexus devices, it offers a donate version, for more timely updates.

Step 2:

On your Nexus 7 Tablet

1.Swipe down from the top of the screen to open the control area.
2.Tap the settings icon in the upper right corner.
3.Scroll down to "About tablet" and tap to open.
4.Tap the Build number 7 times and you will see the notification that you are now a developer.
5. Go back one level and you will see "Developer options" above "About tablet"
6.Tap to open Developer options and check the box that says USB debugging
7.Hit the back button to return to the previous screen
8.Tap the “About tablet” option.
8.Make a note of the Android Version and the Build number —  (Example: Android 4.3 and Build JSS15R at the time of this topic on the 2nd generation tablet)

Step 3:

On your PC install the toolkit of your choice, select your device, and allow the appropriate files to download.

Installing drivers


Mark Skippen Toolkit - Select Option 1 'Install Device drivers on your PC and plug in the table when prompted, following the prompts. You are successful when the Windows Device Manager shows your tablet as “Android Phone” \ “Android ADB Interface”


WugFressh Toolkit - Open the Nexus Root Toolkit and click the button that says “Full Driver Installation Guide.” If you’re running Windows 7 you can try the Automatic Driver Configuration option on the next screen.

Follow the instructions, and connect your Nexus 7 to your PC with a USB cable when prompted to do so.
If the  automatic configuration does not work and you receive an error message, right click on “Computer” in the start menu or on the desktop and left click on “manage” then left click on “Device Manager” and look for “Nexus 7” in the right panel, right click on “Nexus 7”  select “update driver”. Then browse for files look in C:\Wugs_NexusRootToolkit.v1.5.2\data\drivers. Then accept to install the driver. You are successful when the Windows Device Manager shows your tablet as “Android Phone” \ “Android ADB Interface”


Step 4:

Unlocking bootloader, rooting, and installing custom recovery

Pre-root Tips

  • Verify that the Android version and build number that you select in the toolkit corresponds with the one you found in the About tablet area.
  • Restart the tablet after enabling USB Debugging and verify
  • Remove screen locks or remember to unlock the screen when the tablet reboots during the rooting process


Mark Skippen Toolkit - Select Option 8 (1 Click for all - Unlock, root,rename, custom recovery, busybox)


The process takes a few minutes, and your device will reboot a few times to run Fastboot and recovery. Don’t worry. This is normal.
Read the screen prompts carefully and follow the instructions and you should safely unlock the bootloader, indicated by the unlocked image on the initial Google splash screen. You will be prompted for the Super User app (I can verify SuperSU) and for the custom recovery (Choose TWRP as suggested). Remember to read and follow the screen prompts and you should have no problem rooting your Nexus 7 2013.


WugFressh Toolkit - Open the Nexus Root Toolkit and click the button that says:

1. Unlock - Read the screen prompts carefully and follow the instructions and you should safely unlock the bootloader, indicated by the unlocked image on the initial Google splash screen. Note your device will restart to run Fastboot, again follow the prompts.

2. In the toolkit check "Custom Recovery" and click "Root". You will reboot to run Fastboot, again read and follow the prompts and you should have no problem rooting your Nexus 7 2013.

Step 5

When your device reboots, setup your Nexus with your Google account and go to Apps and run the SuperSU and allow to run, then re-install your Google Play apps and enjoy the benefits of Root.

Notes on Root Failure and Restoration

1. If your root attempt fails and you followed the prompts correctly, your device will reboot with no ill effects. At the worst case, you may have to re-install a factory rom.

2. If your Toolkit does not list your current build, your root attempt may fail. Mark Skippen's pro version offers the best insurance of build compatibility, PM me on our forum for questions on compatibility.

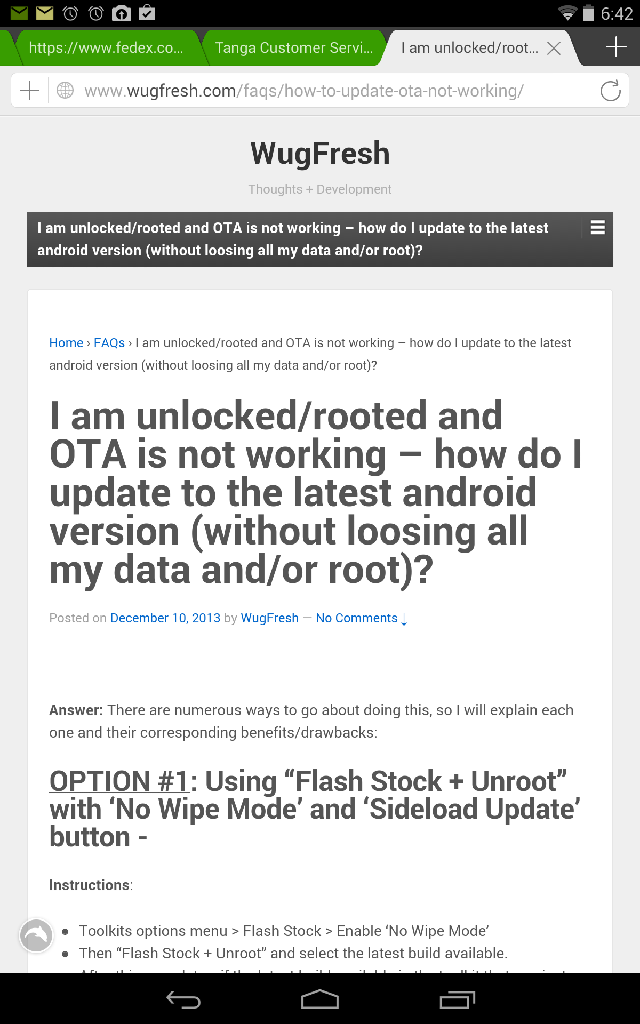
3. After Android 4.3 apps like OTA RootKeeper will no longer preserve root, so I have prepared a guide to root restoration after OTA Updates. Here

S.Prime

 Nexus7Forum.com appreciates your comments and suggests that you post any issues that you encounter, so that the guide can be updated to correct any unanticipated problems. Please remember the choice to root is yours and we accept no responsibility for your device.

Post you Questions and Suggestions Here.

29
BBM will be available as a free download for Android smartphones running Ice Cream Sandwich and Jelly Bean (Android 4.x) beginning at 7AM EDT on 21 September. BBM for iPhones running iOS 6 and iOS 7 will become available for each market on the App Store schedule of 12:01 AM local time on 22 September.

30
Quickoffice for Free and 10 Gb of additional Google Drive Space

Download Quickoffice by 26Sep2013 and get 10 Gb of extra Google Drive space for two years.

Click Here for Quickoffice at the Play Store.


Description
This free app from Google lets you create and edit Microsoft® Office documents, spreadsheets and presentations on your Android phone and tablet. Sign in with your Google Account to save work in Google Drive, which gives you up to 15GB of free storage and lets you access your files from any mobile device or computer.
With Quickoffice and a Google Account you can:
- Create and edit Word, Excel and PowerPoint files
- Access files in Google Drive and on your device
- Open and view PDF files
- Share files through previously shared Google Drive folders
- Attach files to emails

Pages: 1 [2] 3 4 ... 7

* Top Boards

* 'Like' And 'Follow' Us!

* Top Posters

bjs229 bjs229
2682 Posts
S.Prime S.Prime
2017 Posts
Babyfacemagee Babyfacemagee
1263 Posts
matt matt
936 Posts
birdastrompgman birdastrompgman
840 Posts
loociddreemr loociddreemr
708 Posts
radiocycle radiocycle
653 Posts