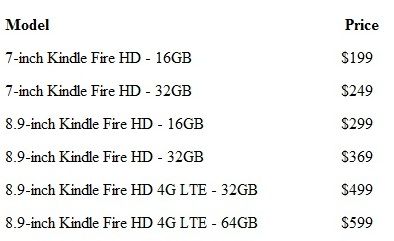
April 29, 2024, 06:43:10 AM

collapse

Show Posts

This section allows you to view all posts made by this member. Note that you can only see posts made in areas you currently have access to.


Topics - S.Prime

Pages: 1 ... 4 5 [6] 7
76
Nexus 7 User Tips / Simple Contact Transfer from Outlook 2010 to the Nexus 7
« on: September 21, 2012, 04:52:50 PM »
If you are using Microsoft Office 2010 and want to transfer your contacts to your Nexus 7 without embracing the Google cloud, you can use the following method to transfer your contacts, but remember that they will not synchronize, so if you change a contact on your Nexus 7 it will not change in Outlook.

1. Create an email message in Outlook.

2. Select Attach Item > Business Card > Other Business Cards…

3. Hold down Shift or CTRL and click the contacts you wish to include in the export. Click OK when finished.

4. Create a folder on your Desktop to hold your vCard files.

5. In the Attached section of the fake email you created, you will have a bunch of files with an extension of VCF. You can highlight all of these files and drag them to the folder on your Desktop. You will now have a folder filled with your previous contacts in VCF or vCard format.

6. Use Google Drive or DropBox to transfer the vcf files to your Nexus 7 (remember the location, so that you can delete them later).

7. Open contacts on the Nexus 7 and tap the menu, select import from sdcard, and select the account where the contacts will be added. Note if you are using the stock launcher, tap the app icon (circle with dots inside) and scroll to "People."

77
Nexus 7 News - - Front Page Comments and Discussion / Logo Quiz
« on: September 20, 2012, 10:20:06 AM »


If you are like me and find yourself lost in the modern gaming world, you can have some fun and test your logo knowledge with "Logo Quiz. You can start, stop, and resume play or even reset and start over and you can even create a user account or just play as a guest. You will find it as a free app on Google Play. Here.


78

A post by our administrator Babyfacemegee drew comments yesterday when he used the term memory to describe internal storage, but interestingly the following help topic from Google Support states that apps use two types of memory, internal storage and RAM. I am the first to admit that this goes against my Microsoft Windows mindset, but we are using Google's Android. Also, if you have ever wondered about the two squares at the bottom of the Nexus 7's screen that shows your recent apps, look at the section below describing "Show Cached Processes" and you see your recent app as a cached process with a usage value. Notably when I tap the double squares and swipe the app to remove it from the list it is removed from cached processes. As my tablet is rooted, I cannot guarantee the same results, but report your results, if you test cached processes in relation to the recent apps feature and note if you are rooted or stock.


Quote
Optimize memory usage


You typically don’t need to worry about managing apps beyond installing, opening, and using them. But there may be times when you want to know more about what's happening behind the scenes.
 
Apps use two kinds of memory: internal storage and RAM. They use internal storage for themselves and any files, settings, and other data they use. They also use RAM (memory designed for temporary storage and fast access) when they're running.
 
Android manages and carefully guards the portion of internal storage where the system, apps, and most data for those apps are stored, because this area may contain your private information. It's not possible to view this portion of internal storage when you connect your device to a computer with a USB cable. The other portion of internal storage, where music, downloaded files, and so on are stored, remains visible for your convenience.
 
Android also manages how apps use RAM. It may cache some things you’ve been using recently, for quicker access if you need them again, but it will erase the cache if it needs the RAM for new activities.
 
You affect the way apps use internal storage directly and indirectly in many ways—for example, by:

 •Installing or uninstalling apps.

 •Downloading files in Browser, Gmail, and other apps.

 •Creating files (for example, by taking pictures).

 •Deleting downloaded files or files you created.

 •Copying files between your device and a computer via USB or Bluetooth.
 
You rarely need to manage the way apps use RAM. But you can monitor apps' RAM usage and stop them if they misbehave.

Use the Apps screen
 
The Apps screen allows you to adjust several aspects of the way your device uses memory.

To view these settings:

1.From a Home or All Apps screen, touch the Settings icon .

2.Under Device, touch Apps.
 
You'll see three tabs at the top of the screen, each displaying a list of apps or their components:

 •Downloaded. Displays apps you’ve downloaded on Google Play or other sources.

 •Running. Displays all apps, processes, and services that are currently running or that have cached processes, and how much RAM they are using.

 The graph at the bottom of the Running tab shows the total RAM in use and the amount free. Below the graph, touch Show cached processes or Show running services to switch back and forth.
 
•All. Displays all apps that came with Android and all apps you downloaded on Google Play or other sources.
 
To switch the order of the lists displayed in the Downloaded or All tabs, touch Menu icon> Sort by name or Sort by size.

To view details about an app or other item listed under any tab, touch its name. The information and controls available vary among different types of apps, but commonly include:

 •Force stop button: Stops an app that is misbehaving. Stopping an app, process, or service may cause your device to stop working correctly. You may need to restart your device after doing this.

 •Uninstall button: Deletes the app and all of its data and settings.

 •Disable button: Prevents the app from running, but does not uninstall it. This option is available for some apps and services that can't be uninstalled.

 •Clear data button: Delete an app’s settings and other data without removing the app itself.

•Clear cache: If the app stores data in a temporary area of the phone's memory, lists how much information is stored, and includes a button for clearing it.

 •Launch by default: If you have configured an app to launch certain file types by default, you can clear that setting here.

 •Permissions: Lists the kinds of information about your phone and data the app has access to.


The link to the entire help topic can be seen Here.

79
'Accessories' Member Reviews / The Ultimate SleeveCase by WaterField Designs
« on: September 10, 2012, 08:25:55 AM »
            Waterfield Designs (Link) based in San Francisco, CA not only boasts of custom designs and quality construction, they provide a complete line of bags, sleeves, and pouches for your electronic devices, and give us an assortment of case options for our Nexus 7. My personal choice the "Ultimate SleeveCase" offers the user, who prefers the naked feel of the Nexus 7, the ultimate in protection and style. The case has a soft patented Ultrasuede inter lining, neoprene cushioning, and a ballistic nylon outer shell, which combine to offer impact and water resistance. The case options include D-rings, a shoulder strap, and a leather bottom accent. I chose the leather accent and did not regret my decision. The naked Nexus 7 fits snuggly in the case and is secured with a Velcro closure allowing the Nexus 7 to be held securely with no internal case movement, therefore do not plan on using a portfolio case in conjunction with the SleeveCase.


I find the WaterField case most useful as extra protection for my device that can be dropped into a messenger bag, backpack, or purse when you are on the go and yet it is stylish and functional enough to be used on its own, when attending a business meeting. If you travel by air frequently, you well also appreciate that the design is also TSA Checkpoint Friendly, which negates removing the tablet at the airport security check point. I did not find that the compact design of the case lent itself to the use of a shoulder strap and preferred using it as a clutch case when using it on its own.


There is a convenient rear storage compartment that is the perfect size for my OTG cable and USB drive without taking away from the compact look of the case. If I had one suggestion for WaterField I would like to see the case include the ability to activate the magnetic on/off switch on tablet insertion and removal. The Ultimate SleeveCase is not your everyday budget item, but quality comes at a price and this is one case that I plan to use for a long time.

You can see all of the WaterField Designs products at their website by clicking Here or just the SleeveCase Here.

Review by Nexus7Forum.com Moderator S.Prime.

Additional Views of the Ultimate SleeveCase:


80
Nexus 7 User Tips / A Guide to Transfering Contacts to your Nexus 7
« on: September 09, 2012, 08:39:56 AM »
Contacts can be moved from other devices to your Nexus 7 if those devices support exporting to a vcf file. You can export your "Phone Contacts" or "Outlook Contacts" and then import them into your Nexus 7, but if you do not import them into your Gmail contacts they will not stay synced. The Gmail contacts are stored in the Google cloud, so regardless of the device using the contacts the changes are available on all devices. It does require that you trust Google with your information that is stored in your contacts, but that is up to the individual. Personally I use a paid Exchange service because of the additional security. You can use the manual export/import method, but it becomes a nightmare trying to keep multiple devices synced. Follow these steps to export/import your contacts with an Android device.

Step 1
       Open contacts/people on your Android Phone or device tap menu and select export your contacts will be exported to a vcf file and saved to your sdcard storage area.

Step 2
       Use a file manager like Astro and save the vcf file to Google Drive or Dropbox

Step 3
       Access Google Drive or Dropbox from your Nexus 7 and download the vcf file to the root of your sdcard storage area

Setp 4
       Open contacts/people on your Nexus 7 tap menu and choose import and select the account into which you want the contacts to be imported.
       Remember continuous synchronization will only happen if you choose a cloud based account like Google and all new contacts are created in that account.

Import and export success varies from device to device using a vcf file, but if all goes well you should have all of your existing contacts transfered to your Nexus 7.

Note that IOS and Outlook can export to vcf files as well.


Edit: Post your results or any additional suggestions and I will update the guide accordingly.

81
The Lounge: Off Topic Forum / Amazon Kindle Fire HD Family
« on: September 07, 2012, 08:33:01 AM »
Amazon announced the new Kindle Fire HD Family yesterday with some impressive specs, but would you be willing to give up your Google Play Store apps and have advertisement pushed to your lock screen? Certainly the original Kindle Fire had some impressive first year sales, but how will its new HD line fair with the competition from the Nexus 7? Also, is this the beginning of the tablet wars?

Kindle Fire HD Pricing:


Edit:
        BTW, My choice remains the Nexus 7   8)

S.Prime


82
Nexus 7 User Tips / Tutorial for the Forum Search Function
« on: September 04, 2012, 06:15:15 PM »
The forum search function is a valuable tool for finding information in the forum. I personally use it often when I can remember a post but I do not remember the location of the post. First you should recognize the difference in "Threads/Topics" and "Posts", for example we are in the topic "Nexus 7 User Tips"  and the Sub-Thread/Topic is "Tutorial for the Forum Search Function" and you are actually reading the first "Post" in the thread and if you reply it will be an additional "Post." Remember, "Topic" and "Thread" is the same terms.  


For the Search Function From a Web Browser:

Step 1:
   
Click the Home Tab to search the entire forum or click the Forum Tab and select the appropriate Topic to search only that topic. For example if you are in the Topic "New Member Introductions" and search for "Rooting Guide" you will find no returns, but if you search from the Home tab you will get a positive return and find my guide for rooting your tablet, which is in the "Rooting" topic.

Step 2:

Click the magnifying glass in the search bar to clear the current content and place your cursor in the search bar. Then type your search text and press enter/return to complete the search. Note after typing your search text if you click on the magnifying glass it will not complete the search.

Step 3:

Scroll through the search returns to find information relevant to your search.


Tapatalk Variant:

Tapping "More" shows the search function and performing a search yields the choice of "Threads" (Default) or "Posts" (Option).

Note to all Users:

We have many members who are new to not only the Nexus 7 Tablet, but are new to Forums, so please help the moderators when you note a post that has been covered in a previously posted topic by posting a link to the topic and politely suggesting that a search would have found the information. Remember helping others learn to use the forum is as important as helping them use their tablets.” IMO”

83
Nexus 7 General Discussion / Angry Birds ad free is free
« on: August 30, 2012, 05:55:08 AM »
Today, 30Aug2012, Angry Birds Ad Free is the free app of the day at the Amazon App Store. You will need to go to settings / applications and enable unknown sources, then download the Amazon App Store Android app and you will see the daily free app from Amazon. Over the past year I have been able to aquire quite a few valuable apps for free.

84
How to Insert a Hyper Link and Look Like an Advanced User


Have you ever wondered how some members can insert a hyperlink with a custom label like Our Forum instead of http://nexus7forum.com/index.php. Both hyperlinks take you to the same place, but the custom label has distinction.

Note, that I am removing the left and right outside brackets in the examples so that they show as text and not an actual hyperlink.

First copy the hyperlink to you clipboard. Then choose “Insert Hyperlink” at the point you want to add it to your post and you get “url][/url” with cursor flashing in the middle. Move the cursor to the point following the first “url” add an “=” sign and paste your hyperlink, so that it looks like “url=http://nexus7forum.com/index.php][/url". Then type your custom label between the last two brackets, so that it looks like this, “url=http://nexus7forum.com/index.php]Our Forum[/url” and you are done.

Note you have the option to type the custom label first and then paste the url the order is not relevant.

85
Guide to Auto-Rotation for the Nexus 7 Home Screen and App Tray. Edit: Auto-Rotation is built into the Nexus 7 in version 4.1.2 and later.

One of the biggest user annoyances for me is the failure of the Nexus 7 to auto-rotate from portrait to landscape mode when viewing the tablet’s Home Page.
As I am not one to allow the vendor to dictate how I use my device, I have found two methods which will allow auto-rotation.

Method 1:

Uses the Ultimate Rotation Control App available at Google Play and offers a 7 day trail with a permanent license for $3 and does not require Root. Available Here.

Method 2:

Is the free version, but it does require Root to edit the system\build.prop file. The following is a step by step guide for an easy edit. Read the entire instructions before starting.

Before you start the usual disclaimer applies, that I am not responsible if you screw it up. Use Astro or ES File Explorer to save a copy of your system\build.prop file to a user accessible location like documents and send a copy to dropbox or copy it to your PC. If you follow the instructions exactly as written you are unlikely to have any problem, as this is the safest method that I have found.

Step 1

Download the free ROM Toolbox fron Google Play Here and install

Step 2

Open ROM Toolbox and tap Performance at the top

Screenshot:


Step 3

Tap build.prop editor

Screenshot:


Step 4


Tap the pencil in the upper right hand corner and scroll to the bottom and add the exact following line as the last line. Be careful to type it exactly as shown or your tablet may fail to start (See screenshot below).

launcher.force_enable_rotation=true

Click on the save icon in the upper right corner, exit the build.prop editor and ROM Toolbox and reboot your Nexus 7 and enjoy auto-rotation.

Screenshot:


86
JayJ’s Easy Flash Install for the Non-Rooted or Rooted Nexus 7

Thanks to forum member JayJ for the following information, you can now install Flash on your Nexus 7 without rooting your tablet. You will also find that it works equally well with a rooted Nexus 7. The Google Chrome browser will not support Flash, but xScope Browser combined with a modified Flash apk from XDA Developers will give you the ability to display Flash content on your tablet.

Step 1:

Swipe down from the top of your tablet’s screen and tap the 3 sliders to enter “Settings” on your tablet. Then tap “Security” and place a check in the block by “Unknown Sources” and then tap on the “Home” button at the bottom.

Step 2:

Go to Google Play, then download and install xScope Browser Here. If you prefer more handholding with the Flash install xScope Browser Pro at $.99 US Here.

Step 3:

Open the xScope Browser and you will be asked if you want to install Flash Player. Accept and you will be taken to XDA Developers where you can download the Adobe_Flash_Player.apk. Next accept the option to run the apk. Note the apk is stored in /sdcard/download if you miss the run option.
I did not use the xScope Browser Pro, so I am uncertain of the additional benefits of Flash install assistance in the pro version.

Step 4: Test Flash

The following link will allow you to test your Flash Plugin. Remember to use Flash you will have to access the Flash content through the xScope Browser. Tapping the center of the first test block will prompt your browser choice, then tap the play button and watch the balls rearrange. The second test is a Flash video. Tap Here to test your Flash install.

Enjoy Flash on your Nexus 7.

87
Nexus 7 Ordering and Shipping / Vendors selling the Nexus 7
« on: August 01, 2012, 11:05:33 AM »
I was in my local Wal-Mart today and glanced at the tablets display and there was our Nexus 7 16GB for $249.00. Then looking in the case they had 6 of them, with a hand written sticker saying, "Do Not Display Until 30Jul2012".  8)

I also noticed that Staples had the Nexus 7 in their weekly sale flyer last Sunday, but the Staples Website says, "In Store Only Special Order".

So post the vendors that you have seen selling our Nexus 7.

S.Prime

88
Post your rooting issues and tips for the Nexus 7 Tablet. We will add the knowledge from this topic to the official "Step by Step Guide" and also attempt to resolve any rooting problems. The contributions from successful rooters will be greatly appreciated.

S.Prime

89
How to Root Your Google Nexus 7 Tablet

This step by step guide will help you unlock the bootloader, root your tablet, install a superuser app, busybox, and a custom recovery.

Rooting, for those of you that don't know, means giving yourself root permissions on your Android device. This is similar to running programs as administrators in Windows, or running a command with sudo in Linux. With a rooted Android device, you can run apps that are normally blocked because they require access to the system area of your device. The locked system partition on an Android phone or tablet allows the vendor to channel the usage of the device to enhance their profit potential, much as Amazon did with the Kindle Fire which limited purchasing apps to the Amazon App Store.  With root you can also install developed ROM’s, which are custom versions of the Android operating system that are preconfigured with many helpful apps that require root access. Custom ROM’s are like a facelift for and Android device. Recovery on an Android device is a utility accessed on startup which allows you to wipe user data and reset your device to the factory state, but with root you can install a custom recovery like CWM. A custom recovery will allow you to create a full backup of your device, install custom ROM’s and kernels for over clocking your device.  We will discuss these features in more depth in additional topics.

In Summery Rooting will allow you to:
1.Install a custom recovery like CWM or other software
2.Run apps that require root permissions, such as Titanium Backup or AdAway
3.Completely backup and restore the device (Nandroid Backup) or flash custom ROMS

Some cautions before starting:
1.Since unlocking the bootloader will wipe all data from your device, it’s a good idea either to back everything up before starting. This means pictures, music, videos, etc.
2.You will have to reinstall all of your apps and you will be prompted to enter your Google account information
3.Go to Settings  then about and check for updates and update to the latest version  for your tablet before starting (Version 4.1.1 at the time of this topic)
4.Rooting your device is not illegal, but it will void your warranty. The rooting program does have the option to relock the bootloader if you require warranty service.
5.There is always the chance that you can brick your device, which is very unlikely if you follow the steps correctly, but I assume no responsibility for your device.

Fortunately for our purpose Android Developers have produced “Nexus Root Toolkits” which support a one click root for our Nexus 7 2013.

Step 1:

Pick your Toolkit from the two that I have used:

  • Mark Skippen's Nexus 7 2013 Toolkit on xda Here
  • WugFresh's Nexus Root Toolkit Here


Each Toolkit has advantages and both offer a free version, but I have chosen to donate to both developers to support their work. The WugFresh toolkit supports multiple Nexus Devices, and while Mark Skippen's Universal  Toolkit supports multiple Nexus devices, it offers a donate version, for more timely updates.

Step 2:

Note: This guide only shows screen shots from the Wugfresh Toolkit. If you want screen shots from Mark Shippen's toolkit, as well, see the rooting guide for the Nexus 7 2013 as it is equally applicable to the Nexus 7 2012. Here

On your Nexus 7 Tablet

1.Swipe down from the top of the screen to open the notification area.
2.Tap the settings icon next to the time and date.
3.Scroll down to the Developer options area and tap it.
4.Slide the switch to turn on Developer options.
5.Check the box that says USB debugging
6.Hit the back button to return to the previous screen
7.Tap the “About tablet” option.
8.Check the Android Version and make sure you are on the latest version (4.1.1 at the time of this topic). If you are not on the latest version tap “System Updates” at the top of the menu and install the update to 4.1.1 before continuing.
9.Make a note of the Build number — the last item on this screen. (JRO03C at the time of this topic)

Step 3:

On your PC

Installing drivers

Open the Nexus Root Toolkit and click the button that says “Full Driver Installation Guide.” If you’re running Windows 7 you can try the Automatic Driver Configuration option on the next screen.

Follow the instructions, and connect your Nexus 7 to your PC with a USB cable when prompted to do so.
If the  automatic configuration does not work and you receive an error message, right click on “Computer” in the start menu or on the desktop and left click on “manage” then left click on “Device Manager” and look for “Nexus 7” in the right panel, right click on “Nexus 7”  select “update driver”. Then browse for files look in C:\Wugs_NexusRootToolkit.v1.5.2\data\drivers. Then accept to install the driver. You are successful when the Windows Device Manager shows your tablet as “Android Phone” \ “Android ADB Interface”

Step 4:

Unlocking, rooting, and installing custom recovery

4-a:

Once your drivers are installed, you can use the other tools included in the Nexus Root Toolkit. Make sure to choose the model type that corresponds with your device.
The toolkit also supports the Samsung Galaxy Nexus smartphone, so for our purpose, scroll down to the Nexus 7 section and choose the build number that corresponds with the one you found in the About tablet area.

Edit 06Nov2012-- If your Nexus 7 is running Android 4.1.2, make sure you have version 1.5.5 of the Root ToolKit.


4-b

Click on the unlock button in the Nexus Root Toolkit. ADB Check will run (Note procedure below if ADB Check freezes). Follow the on screen prompts and the toolkit will reboot your device, unlock the bootloader, wipe all your data, and then return you to the Android 4.1.1 setup screen that you initially saw when you turned on your tablet. You can reenter you setup information, but be sure to enable USB Debuugging as you did in step 2 above.

The process takes a few minutes, and your device may reboot a few times. Don’t worry. This is normal.
Read the screen prompts carefully and follow the instructions and you should safely unlock the bootloader, indicated by the unlocked image on the initial Google splash screen.

IF THE PROGRAM IS STALLING ON YOU (FOR ADB CHECK):

1.Restart the toolkit ( You may have to use Ctrl+Alt+Del to open Task Manager and end the Toolkit)
2.On the main interface hit the "Launch" button to open Advanced utilities
3.In the advanced utilities interface; hit the "Launch CMD Prompt" button
4.Type the following cmd without the quotation marks:
“adb start-server”  and then press enter
5.Now you should be able to use any of the utilities in the toolkit without it stalling.

This extra step is just a temporary solution, until I release v1.5.3; then this won't be necessary.


4-c

The next step roots your tablet, installs SU (Super user app) and BusyBox (provides additional Linux commands)

You have two options for rooting: You can just root your device, or you can also install ClockworkMod Recovery (or CWM). Selecting “Do not flash CWM” will allow you to install a custom touch screen recovery (TWRP) shown below if you prefer. Note you may find it easier to restore your tablet to factory state from the Nexus Toolkit with CWM.

Edit 04Aug2012 by S.Prime - I have experienced issues retaining recovery access with TWRP. If you have the same issues and cannot access recovery with GooManager, connect the tablet to your computer, open the Toolkit and select make CWM permanent and run the root option again and you will have the CWM recovery.


ClockworkMod is a utility that lets you completely backup your device and restore from that backup if anything ever goes wrong or you just want to restore your device to an early state.

When SU installs you will be prompted to Update the binary, so allow it to update.

After BusyBox installs simply close the Busybox window.

The CWM recovery will then install if you selected that option.


Recovery Option:

If you prefer a touch screen option for recovery instead of CWM, like me, you can use TWRP or Team Win Recovery Project. In addition to the touchscreen interface, TWRP includes a file browser and on-screen keyboard for changing the names of your backups and some other nice tools.


You can install TWRP simply by downloading and installing the GooManager app from the Google Play Store, running the app, tapping the menu icon, and then choosing the option to “Install OpenRecoveryScript.”Then you can reboot to TWRP at any time by running GooManager and tapping the “Reboot recovery” option.

Known Issue:

•You cannot access CWM/TWRP from a cold boot (from bootloader and navigating to recovery)
        o     Seems to be a known issue on the Nexus 7 right now. It’s unrelated to the toolkit.
        o     You can access it with an app like QuickBoot, GooManager, or use the adb command: ‘adb reboot recovery’

The Nexus Root Toolkit also lets you relock your device if for some reason you would prefer a locked bootloader, flash the stock version of Android that comes with the Nexus 7 and remove root, or backup and restore your device from your which works better with ClockworkMod rather than TWRP, but I find TWRP my choice due to the touch screen.

Root Preservation:

To protect your root from loss due to OTA updates I would suggest OTA RootKeeper from Google Play, which a free app allowing click and protect.

Edit: After Android 4.3 OTA RootKeeper will no longer preserve root after an OTA Update, but you can follow my guide to Root restoration in the Nexus 7 2013 to restore root. Here

Credits:

       o     wugfresh the developer of the Nexus Root Toolkit. This link to his website will provide additional support and allow you to click on “Donate” and use your PayPal account to contribute to the developer’s effort. (As a rule, if I find that I use a developer’s work, I will contribute $1-$5 US). The same information is available from the xda-developers forum.

S.Prime:

              Nexus7Forum.com appreciates your comments and suggests that you post any issues that you encounter, so that the guide can be updated to correct any unanticipated problems. Please remember the choice to root is yours and we accept no responsibility for your device.


(This awesome step-by-step root guide for your Nexus 7 was put together by our amazing Global Moderator, S. Prime.  A HUGE thank you and shout out to him from all of us at the forum. - BFM}

We are locking this topic for comments, so please post your comments and help requests to http://nexus7forum.com/index.php?topic=370.msg2112#msg2112

90
Coming Soon:

Step by step guide for rooting the Nexus 7. We will include SU and Busybox installation and a touch screen recovery.

Pages: 1 ... 4 5 [6] 7

* Top Boards

* 'Like' And 'Follow' Us!

* Top Posters

bjs229 bjs229
2682 Posts
S.Prime S.Prime
2017 Posts
Babyfacemagee Babyfacemagee
1263 Posts
matt matt
936 Posts
birdastrompgman birdastrompgman
840 Posts
loociddreemr loociddreemr
708 Posts
radiocycle radiocycle
653 Posts